
Posted by Gidget
Have you ever wanted to give someone a gift that feels truly magical the moment they open it? An explosion card — also called an explosion box — is exactly that. It looks like a beautiful wrapped gift box sitting on a table. But when the recipient lifts the lid, the sides fall open to reveal a cascade of photos, notes, and memories layered inside. It’s not just a card. It’s an experience.
I made one recently, and I’m going to walk you through exactly how to do it yourself — from cutting the first piece of cardstock to tying that final ribbon on top.
What Is an Explosion Card?
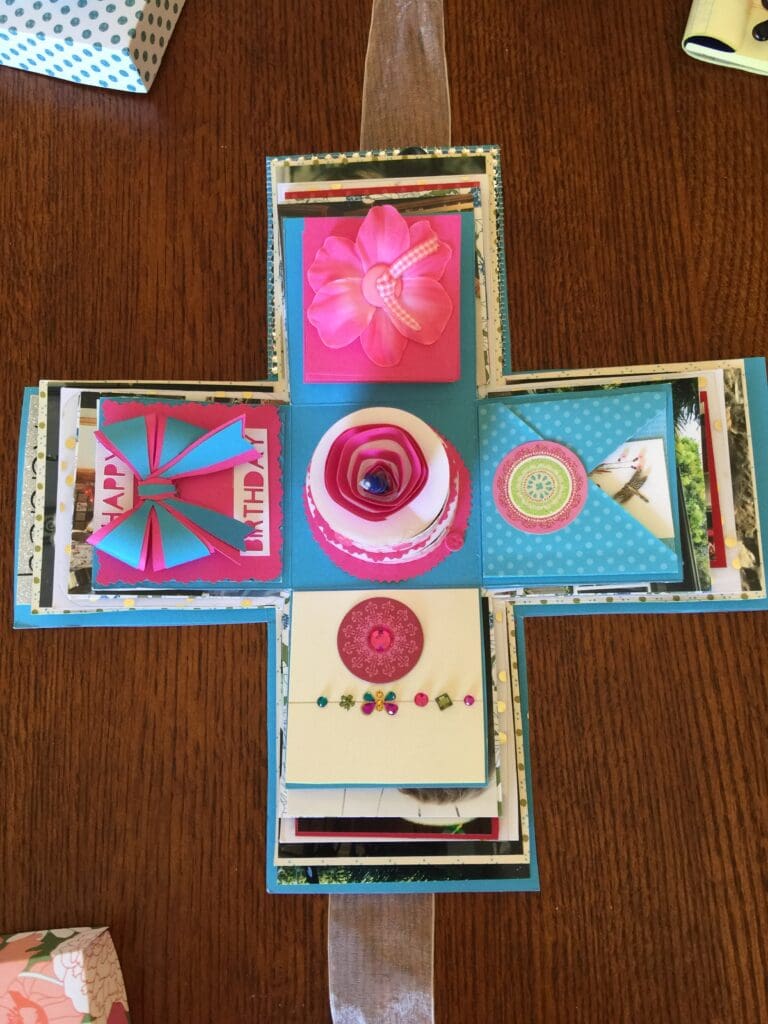
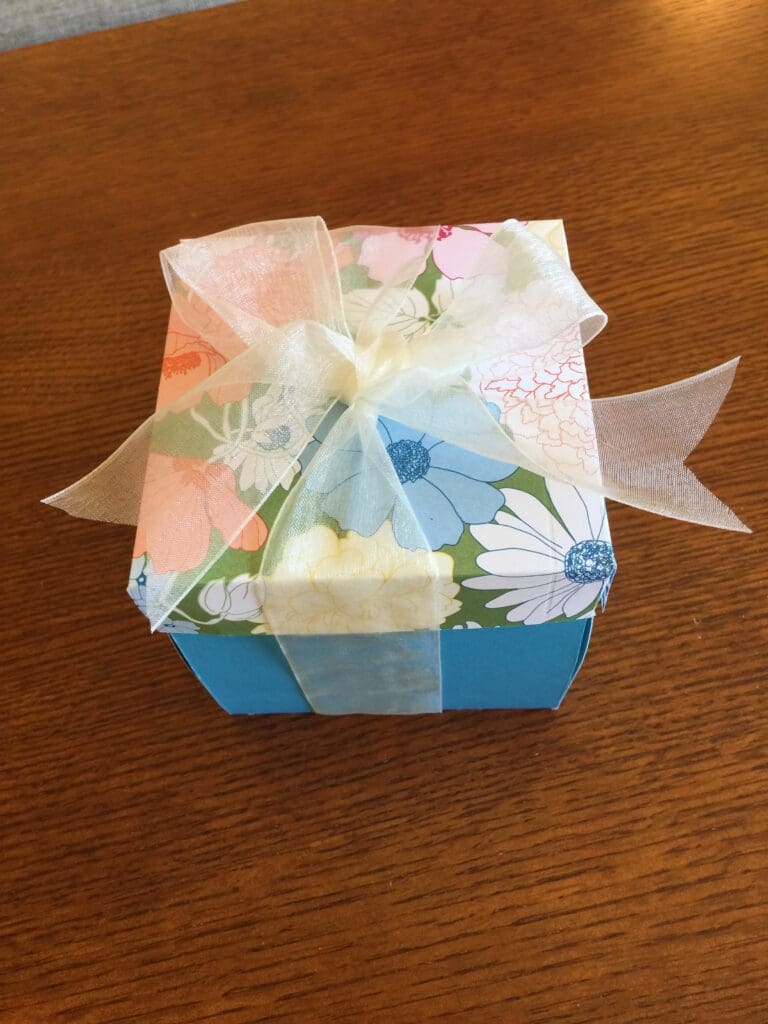
An explosion card is a handmade box crafted from cardstock that “explodes” open when the lid is removed. The four sides of the box fold outward, revealing multiple tiers of pockets and panels where you can tuck photos, journaling cards, small gifts, and heartfelt messages. The whole thing sits inside a base box, and the lid keeps it all neatly “contained” — until the magic moment.
They’re perfect for birthdays, anniversaries, Mother’s Day, graduations, housewarmings, or honestly any occasion where you want to give someone something truly unforgettable.
Supplies You’ll Need
Here’s everything you need to get started. I’ve linked my favorite versions of each on Amazon so you can grab them easily.
- Cardstock — You’ll need solid-color and patterned cardstock. A good variety pack saves you a trip to the craft store. 👉 Shop cardstock variety packs on Amazon https://amzn.to/4uj0EKc
- Scoring board and bone folder — This is the #1 tool that makes or breaks clean folds. Don’t skip it. 👉 Shop scoring boards on Amazonhttps://amzn.to/4uVBVg7
- Paper trimmer or craft knife + cutting mat — For precise, clean cuts. 👉 Shop paper trimmers on Amazonhttps://amzn.to/3RKqOIj
- Adhesive — Tape runner or double-sided tape works best. Liquid glue can warp the paper. 👉 Shop tape runners on Amazonhttps://amzn.to/3QuBOsR
- Ribbon — Sheer organza ribbon gives it that gorgeous gift-box look. 👉 Shop organza ribbon on Amazonhttps://amzn.to/4vqcAuo
- Embellishments — Stickers, die cuts, washi tape, brads — whatever makes your heart happy. 👉 Shop embellishment kits on Amazonhttps://amzn.to/4odhhW0https://amzn.to/4uXSM1S
- Photos or printed journaling cards (optional but beautiful)
The Measurements
You’ll be making three nested boxes — each one slightly larger than the last — plus a lid.
| Piece | Cut Size | Scored Lines |
|---|---|---|
| Inner box (smallest) | 9″ × 9″ | Score at 3″ from each edge |
| Middle box | 9.75″ × 9.75″ | Score at 3.25″ from each edge |
| Outer box (base) | 10.5″ × 10.5″ | Score at 3.5″ from each edge |
| Lid | 6.25″ × 6.25″ | Score at 0.75″ from each edge |
These measurements create a finished box that’s approximately 3″ × 3″ × 3″ when assembled — a great standard size.
Step-by-Step Instructions
Step 1: Cut Your Cardstock
Cut each of your four pieces to the sizes in the table above. Use a paper trimmer for the cleanest, most accurate edges. If you’re using patterned paper for any layer, cut that to the same size and adhere it to your cardstock before scoring.
Step 2: Score and Fold
Using your scoring board and bone folder, score each piece at the marked intervals from all four edges. For the 9″ piece, you’ll score at 3″ from each side — so you’ll have lines at 3″ and 6″ on both the horizontal and vertical axes.
Once scored, fold all lines inward (valley folds) and use your bone folder to create crisp, sharp creases. Clean folds are everything — they’re what make the box look polished and professional.
Step 3: Cut the Corners
On each scored square, cut diagonally into the four corners up to (but not past) where the score lines intersect. This releases the flaps so the box can be formed. You should end up with a cross/plus shape with triangular tabs in each corner.
Step 4: Form the Boxes
Fold up the sides and use your adhesive to secure the corner tabs to the inside of the box walls. Repeat for all three box layers. They should nest inside each other easily — if they don’t, double-check your measurements and try a hair trimmer.
Step 5: Make the Lid
The lid is a simple shallow box. Score at 0.75″ from each edge of your 6.25″ square, cut the corners the same way, fold up, and adhere. It should fit snugly over the top of your outermost box.
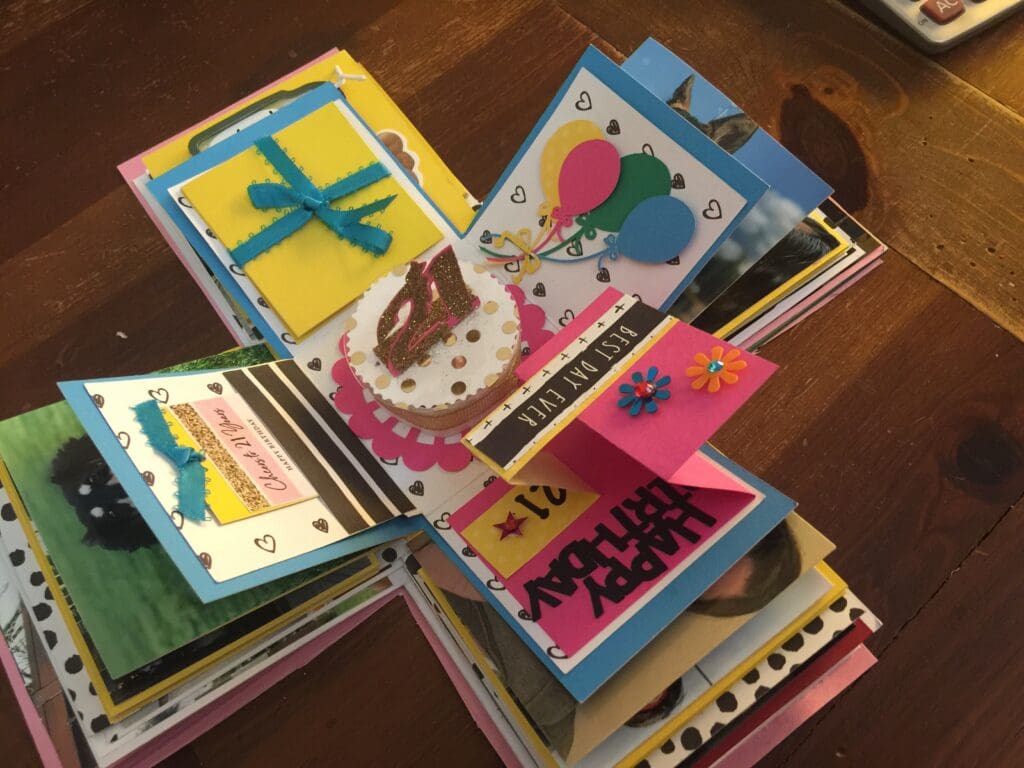
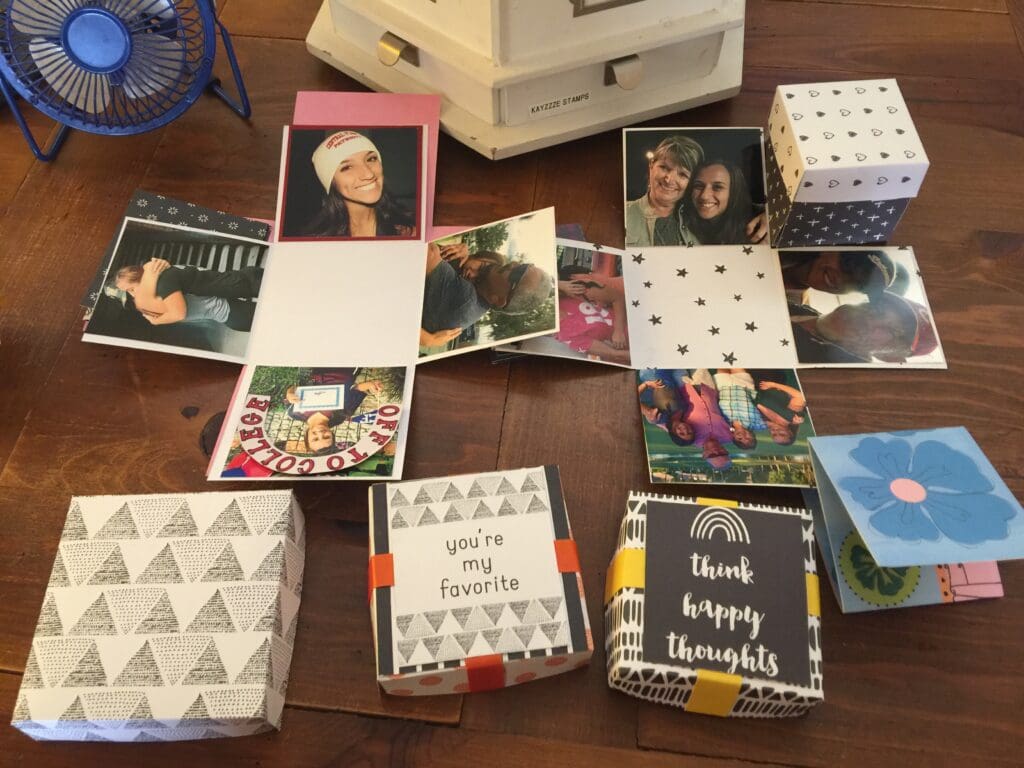
Step 6: Decorate Each Layer
This is the fun part! Here’s a suggested layout:
- Outer box sides — Cover with patterned paper, add borders or washi tape along the top edges
- Middle box sides — Perfect for photos; tuck them in or adhere directly
- Inner box sides — Journaling cards, notes, small memories
- Base (the bottom of the innermost box) — A photo or special message that’s revealed last
Work from the inside out as you decorate so you can layer without crowding.
Step 7: Stack and Assemble
Once all three layers are decorated, nest them together — outer box on the bottom, then middle, then inner. Make sure they sit flat and the sides align.
Step 8: Add the Lid and Ribbon
Place the lid on top. Cut a length of sheer ribbon (about 24″–30″), run it under the base box, bring both ends up and over the lid, and tie a bow on top. This is what holds the whole thing together and gives it that beautiful gift-box presentation.
Tips for Making It Extra Special
Layer with intention. Think of the three boxes as three chapters of a story — the outer layer is the “hello,” the middle is the “heart,” and the inner is the most personal, intimate layer.
Keep it light. Heavy embellishments can make the sides sag when the box opens. Stick to lighter elements or use thicker cardstock (80–100 lb) as your base.
Use a color palette. Choosing 2–3 coordinating colors and one patterned paper will make your box look curated and intentional rather than cluttered.
Practice the open. Before you give it away, set it on a flat surface and gently lift the lid to make sure all the sides fall open cleanly. Sometimes a piece of tape needs adjusting.
The Moment of Magic
There is nothing quite like watching someone receive an explosion card for the first time. They pick it up like a regular gift. They lift the lid — and the sides fall open, revealing everything you’ve tucked inside. Every time, without fail, there’s a gasp.
That moment? Entirely worth the time you put into making it.
If you make one, I’d love to see it! Tag me or send a photo — and if you have questions along the way, drop them in the comments below.
Happy crafting! 🎁
Some links in this post are affiliate links. If you purchase through them, I may earn a small commission at no extra cost to you. I only recommend products I love and use myself. Thank you for the support!